|
How to configure DNS on Cloudflare for WiseRef?

Log in into Cloudflare
To start the configuration process, log in to your Cloudflare account.
Select your website and go to DNS section
After logging in, visit the dashboard and select the domain you wish to configure for the WiseRef integration. Then, navigate to the DNS section to manage the DNS records.
Create new CNAME record
To create a CNAME record pointing to your WiseRef subdomain (e.g., your-workspace-name.wiseref.com), follow these steps:

- Click “Add Record” in the DNS section.
- Choose “CNAME” as the record type.
- Enter the desired subdomain in the “Name” field (e.g., visit, go). This will allow WiseRef to use visit.yourdomain.com for link routing.
- In the “Target” field, input the WiseRef subdomain (e.g., your-space-name.wiseref.com). This is value that you entered during registration as Workspace URL.
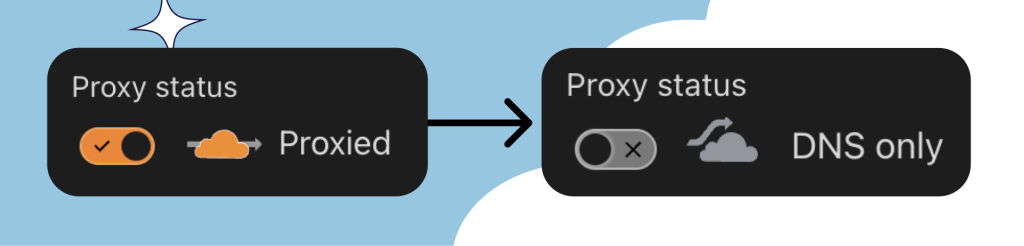
- Ensure Cloudflare Proxy is disabled (not set to “Proxied”).
- Click “Save” to add the new CNAME record.
Note: Be sure to disable Cloudflare Proxy to avoid any issues with the configuration.
Return to WiseRef and proceed with onboarding
Once the CNAME record is successfully created on Cloudflare, return to the WiseRef platform, and proceed with the onboarding process. The newly created CNAME record should allow the branded subdomain to properly point to the WiseRef instance.
Too complicated? Let us help
If you find DNS configuration too overwhelming of a task, do not hesitate to use live support, and one of our professionals will walk you through all the steps you need to do in order to successfully onboard with WiseRef.
|